Hyundai Sonata: Front Axle Assembly / Front Hub - Axle Repair procedures
Hyundai Sonata LF 2014-2019 Service Manual / Driveshaft and axle / Front Axle Assembly / Front Hub - Axle Repair procedures
| Replacement |
Front hub assembly
| 1. |
Raise the vehicle, and make sure it is securely supported. |
| 2. |
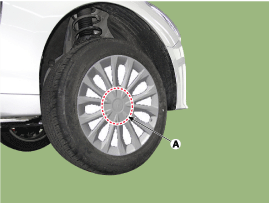
Remove the wheel cap (A).
|
| 3. |
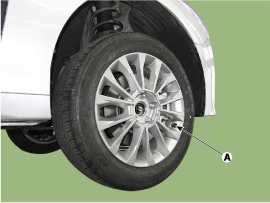
Remove the front wheel and tire (A) from front hub.
|
| 4. |
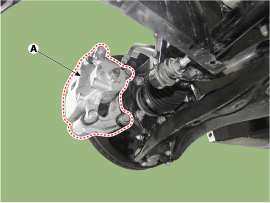
Remove the brake caliper mounting bolts, and then place the brake caliper assembly (A) with wire.
|
| 5. |
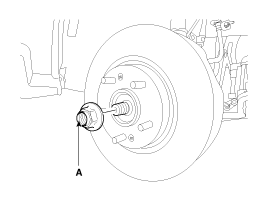
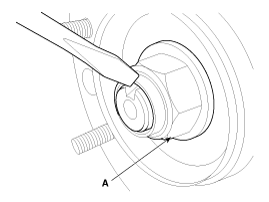
Remove driveshaft nut (A) from the front hub under applying the brake.
|
| 6. |
Loosen the front brake disc mount screw and then remove the front brake disc (A).
|
| 7. |
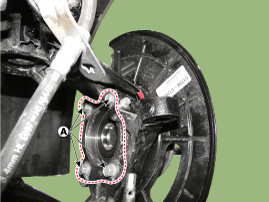
Loosen the bolt (A) and then remove the hub bearing (A).
|
| 8. |
Install in the reverse order of removal. |
Front axle assembly
| 1. |
Raise the vehicle, and make sure it is securely supported. |
| 2. |
Remove the wheel cap (A).
|
| 3. |
Remove the front wheel and tire (A) from front hub.
|
| 4. |
Remove the brake caliper mounting bolts, and then place the brake caliper assembly (A) with wire.
|
| 5. |
Remove driveshaft nut (A) from the front hub under applying the brake.
|
| 6. |
Loosen the front brake disc mount screw and then remove the front brake disc (A).
|
| 7. |
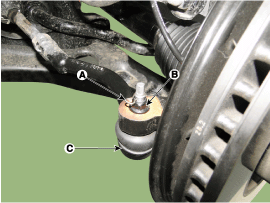
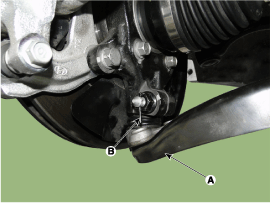
Remove the tie rod end ball joint (C) from the knuckle.
|
| 8. |
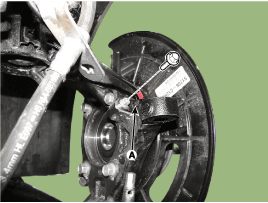
Loosen the mount bolt and then remove the wheel speed sensor (A) from knuckle.
|
| 9. |
Loosen the lower arm mounting and then remove the lower arm (A).
|
| 10. |
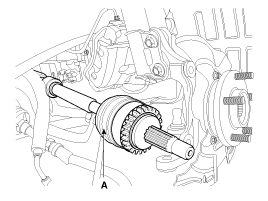
Disconnect the driveshaft (A) from the front hub assembly.
|
| 11. |
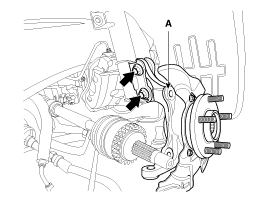
Loosen the strut mount bolts and then remove the knuckle assembly (A).
|
| 12. |
Install in the reverse order of removal..488.3 |
| Disassembly |
| 1. |
Loosen the hub mounting bolt and remove the hub assembly from the axle.
|
| 2. |
Loosen the dust cover monuting bolts (A) and then remove the dust cover from the axle.
|
| 3. |
Reassembly in the reverse order of disassembly. |
| Inspection |
| 1. |
Check the hub for cracks and the splines for wear. |
| 2. |
Check the brake disc for scoring and damage. |
| 3. |
Check the knuckle for cracks. |
| 4. |
Check the bearing for cracks or damage. |
 Front Hub - Axle Components and Components Location
Components
1. Brake disc2. Hub bearing3. Dust cover4. Knuckle
...
Other information:
Hyundai Sonata LF 2014-2019 Service Manual: Clutch Actuator Assembly Specifications
Specification
ItemConditionSpecificationsResistance (line to line)Motor 160 m? ±10 %Motor 264 m? ± 10 %Rated voltage12 VMax. current60 AOperation condition (°C)°F-40 ~ 257 °F (- 40 ~ 125 °C )
...
Hyundai Sonata LF 2014-2019 Owners Manual: Storage compartment
WARNING
Never store cigarette lighters, propane cylinders, or other flammable/explosive
materials in the vehicle. These items may catch fire and/or explode if the vehicle
is exposed to hot temperatures for extended periods.
WARNING
ALWAYS keep the storage compartment covers closed securely while d ...
© 2018-2025 www.hsonatalf.org

